How to Create an AI-Automated Property Inquiry Auto-Response with CogniAgent


Discover how to build AI-automated email follow-ups that trigger the moment a client submits a property inquiry form – without manual email segmentation or repetitive follow-ups.
Most real estate teams waste hours every week manually sorting inquiry forms, copying client details into email templates, and setting reminders to follow up. Miss a follow-up window, and you’ve lost a potential sale. With CogniAgent, all of this happens automatically with a single workflow – no more copying and pasting, no more missed leads, no more paying staff to do repetitive admin work. Let’s start building!
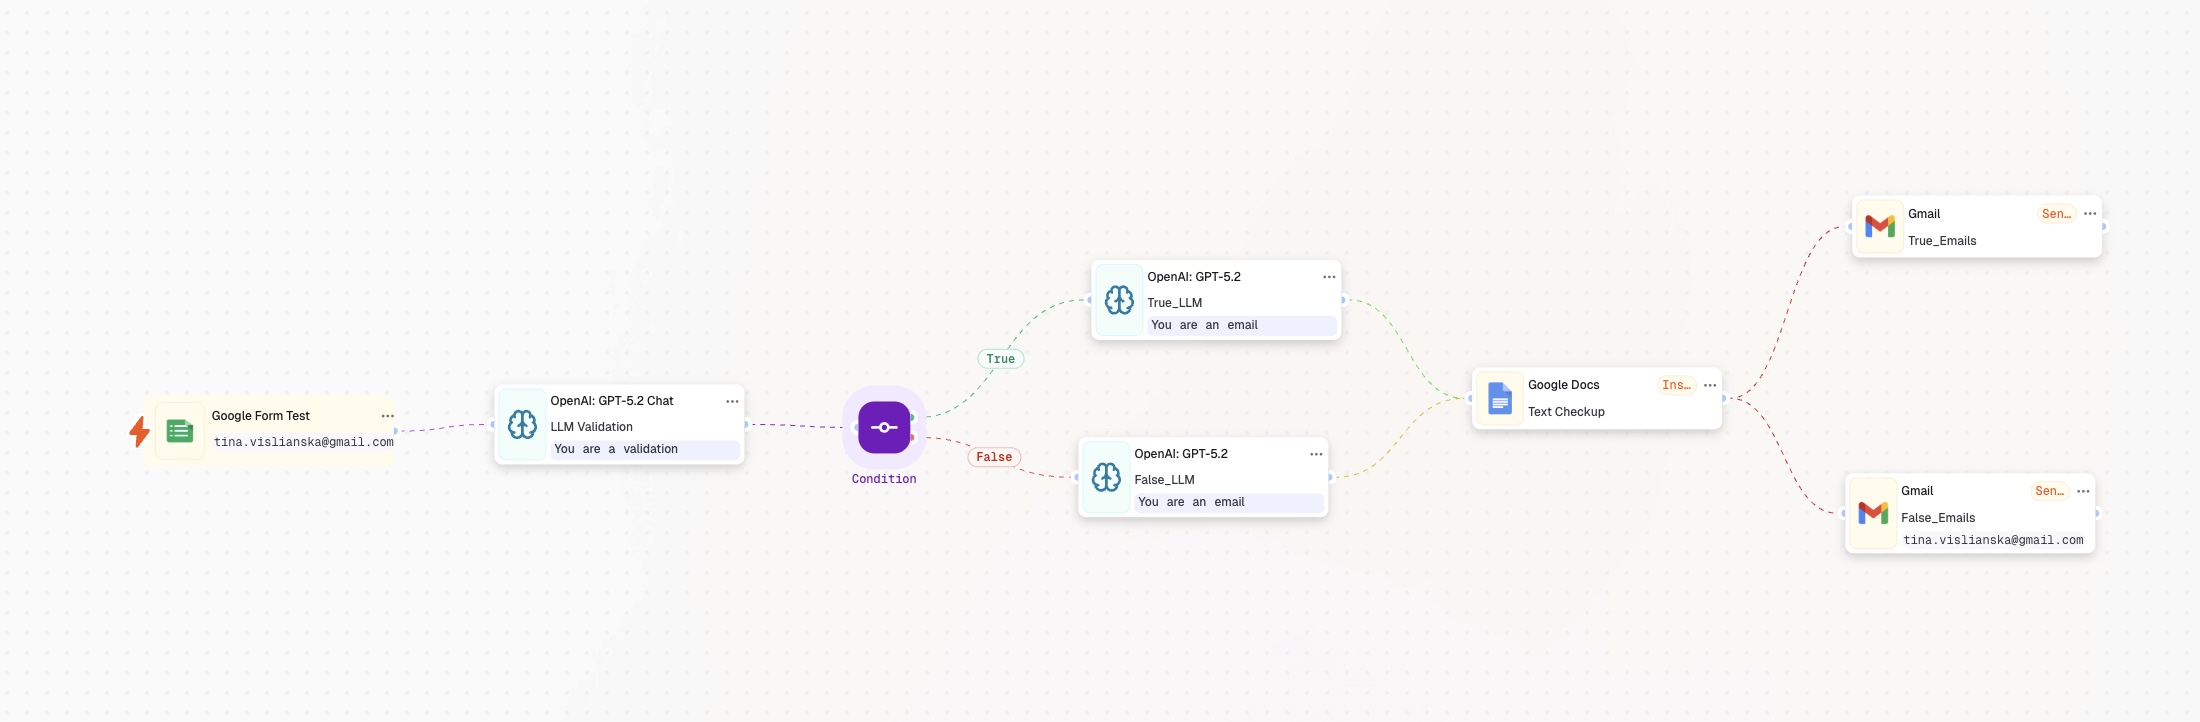
By the end of this guide, you’ll have an AI-powered workflow that:
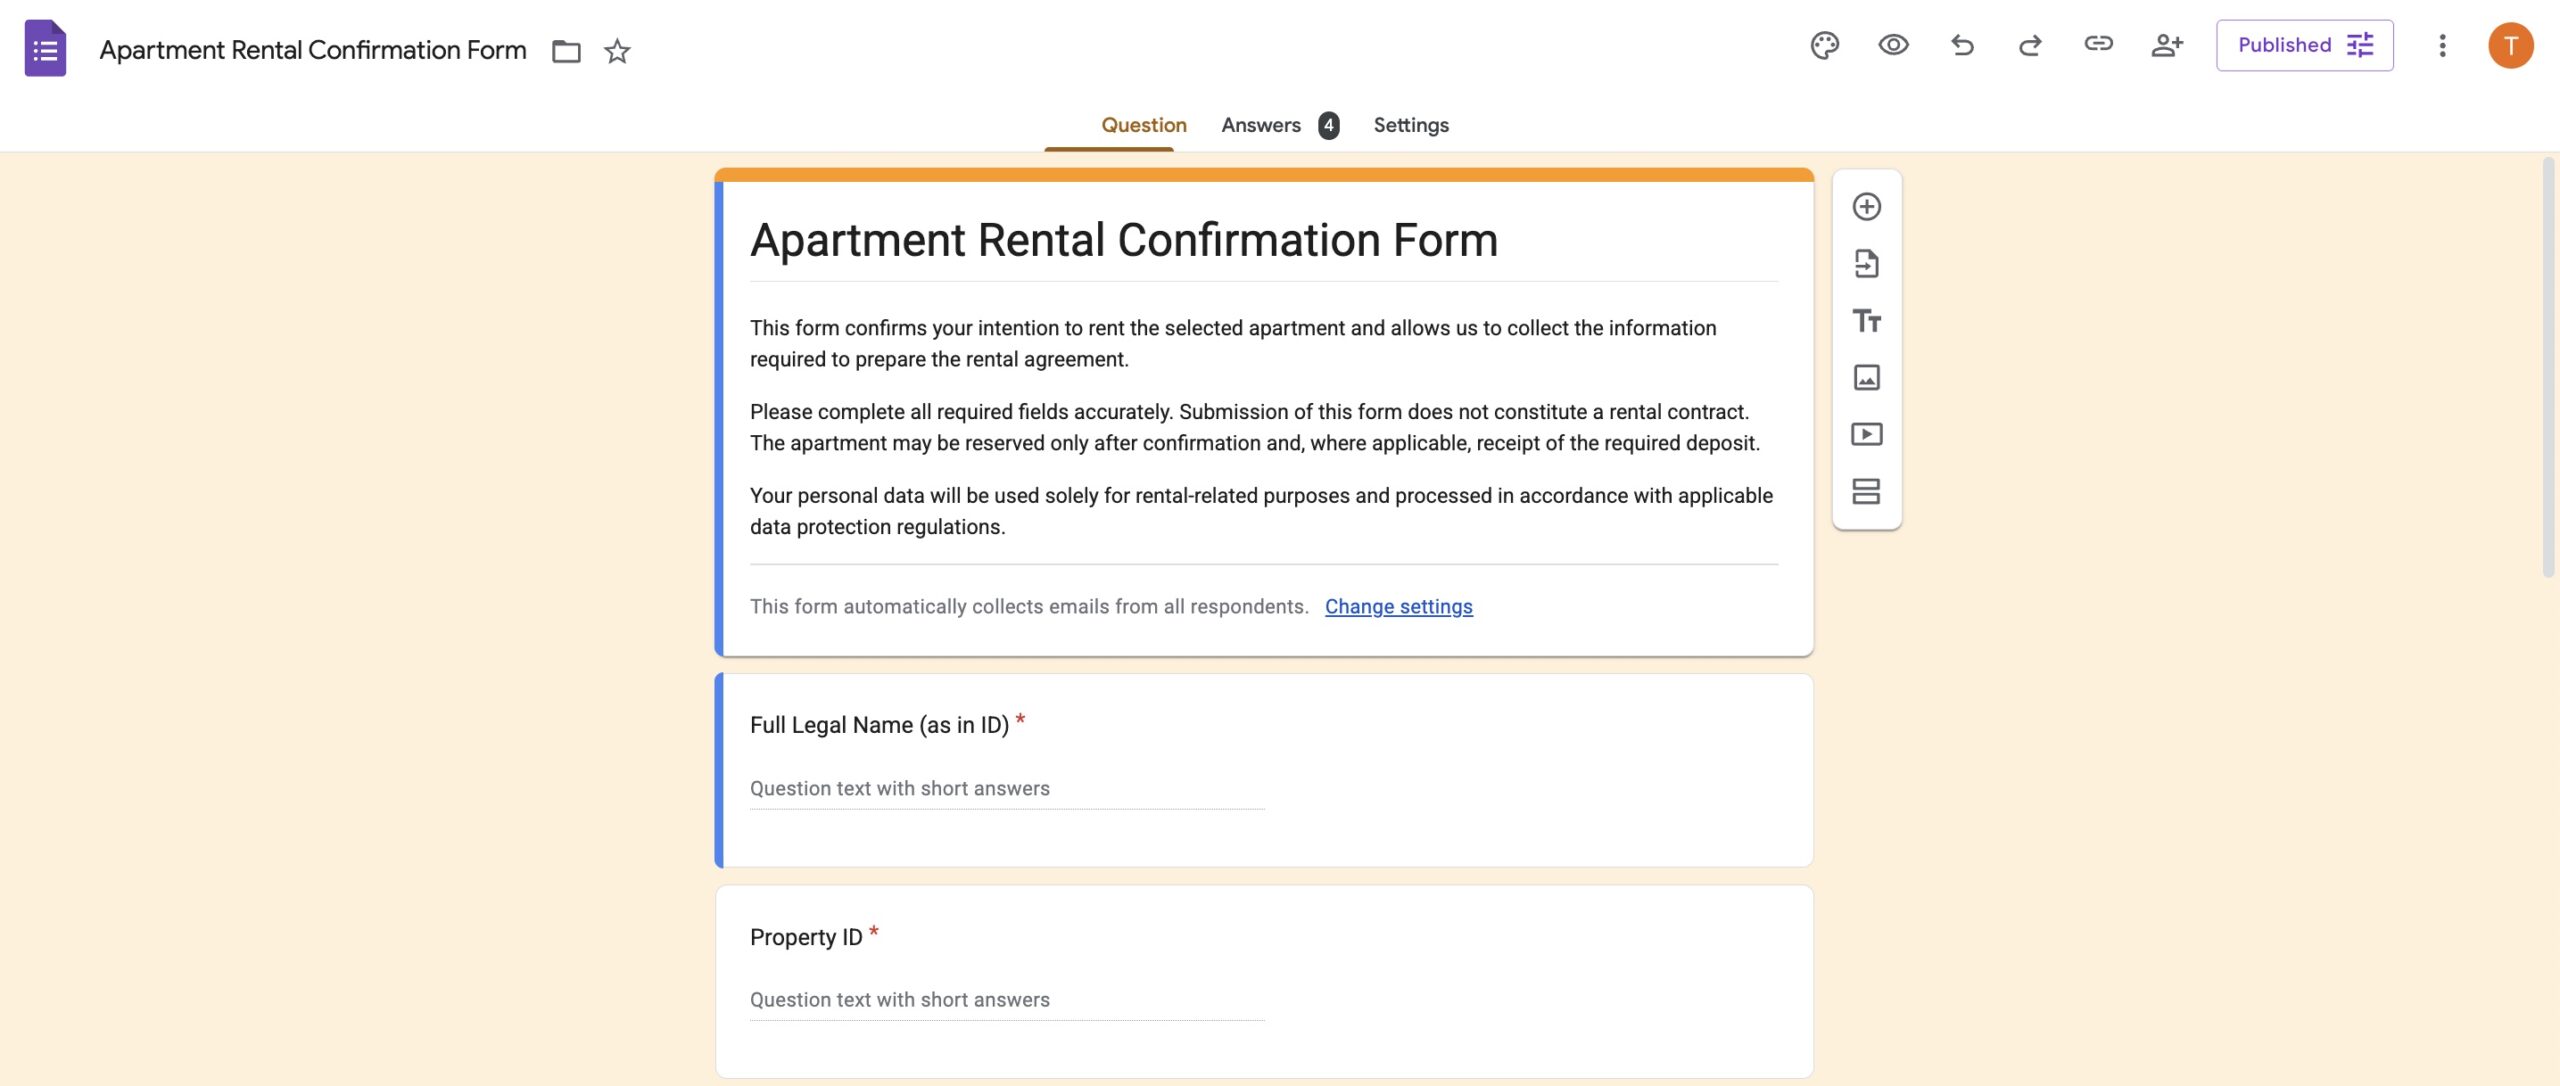
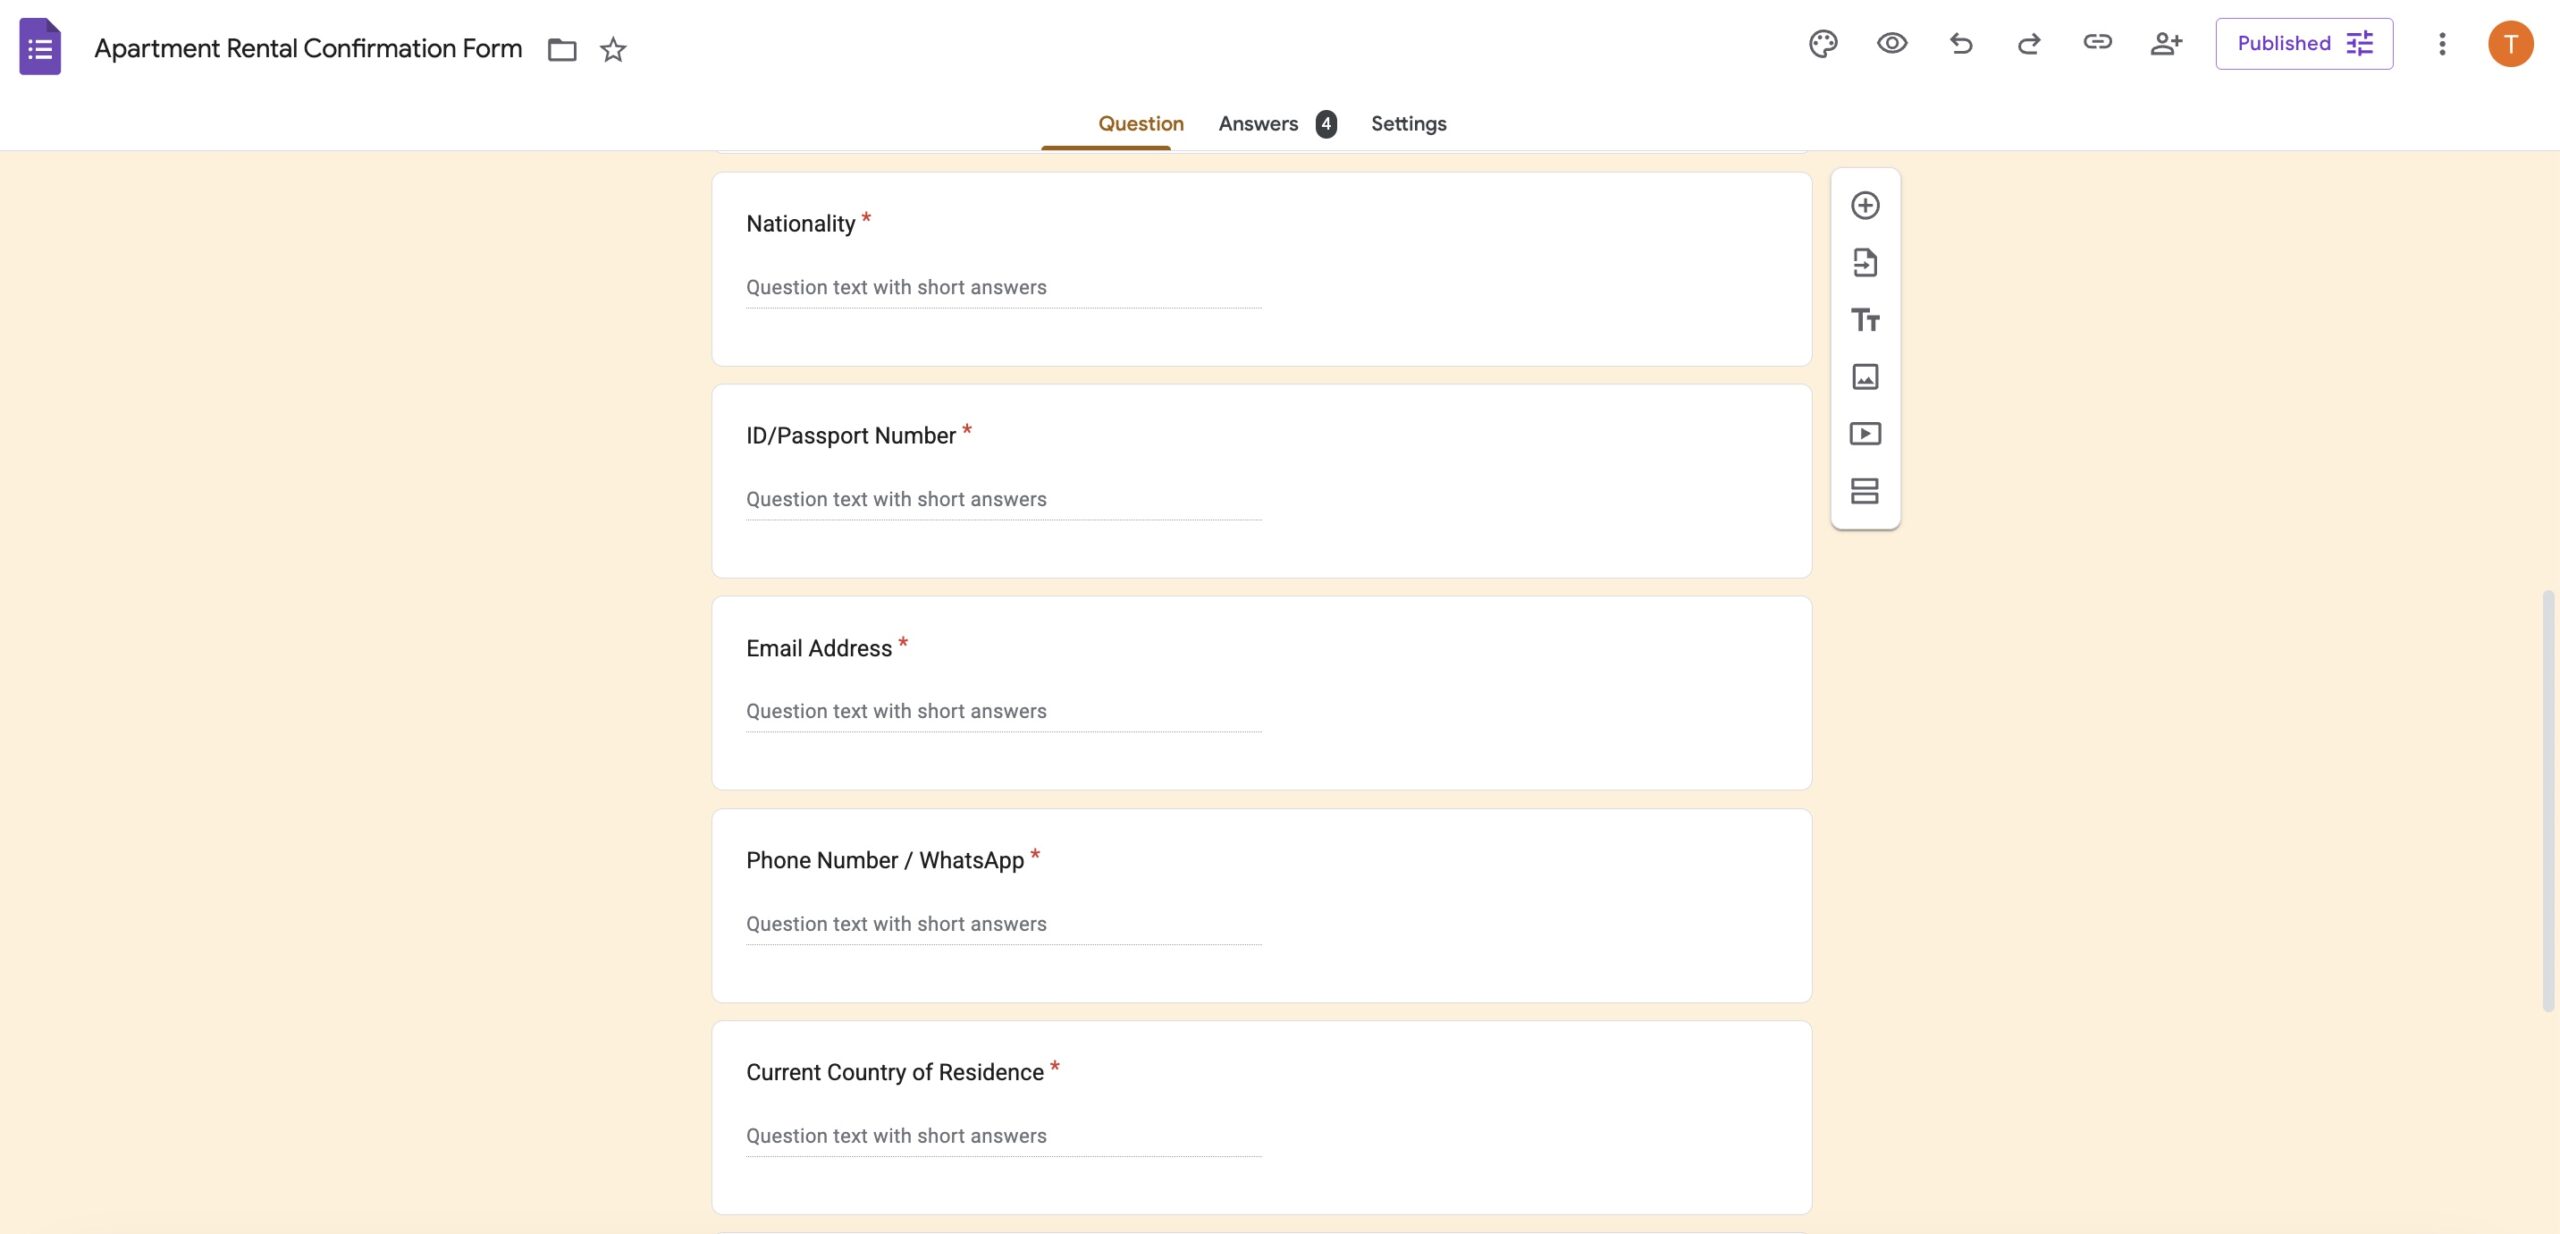
Here’s what your automated workflow will look like in action (customize it to fit your exact needs):
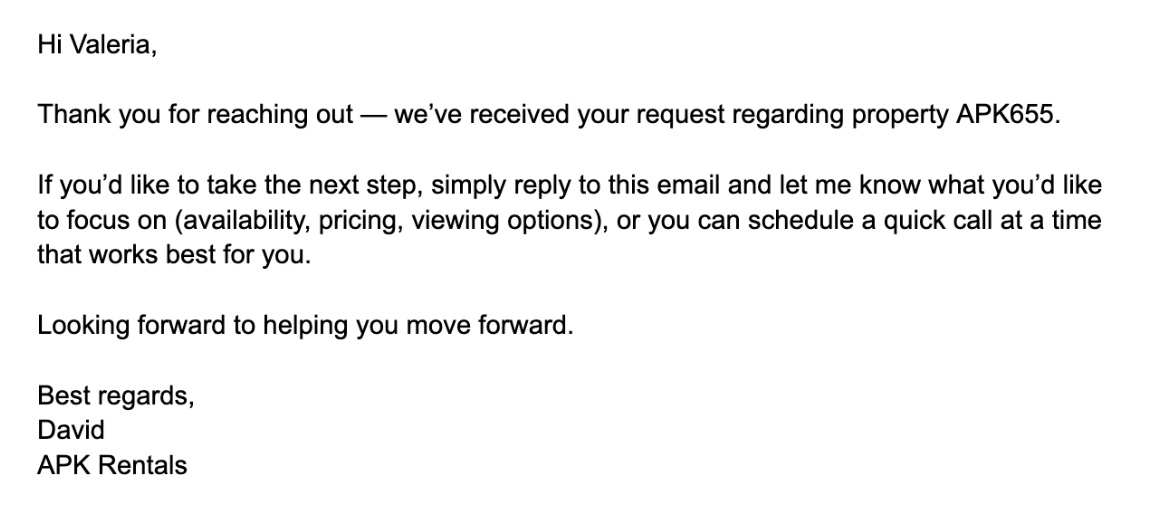
Property inquiries are time-sensitive. The faster and more relevant your response is, the higher the chance of conversion. Automating this step ensures that every lead receives an instant, personalized reply with the correct apartment details – without manual work. You save time, avoid errors, and convert more inquiries into viewings and bookings.
After opening the CogniAgent dashboard, click the “Add Step” button and choose “Event from App.”
As a quick refresher, CogniAgent is an event-driven platform. This means every action in your workflow starts from an event – such as a form submission, a data update, or an external trigger. In this case, the event is a user submitting a Google Form.
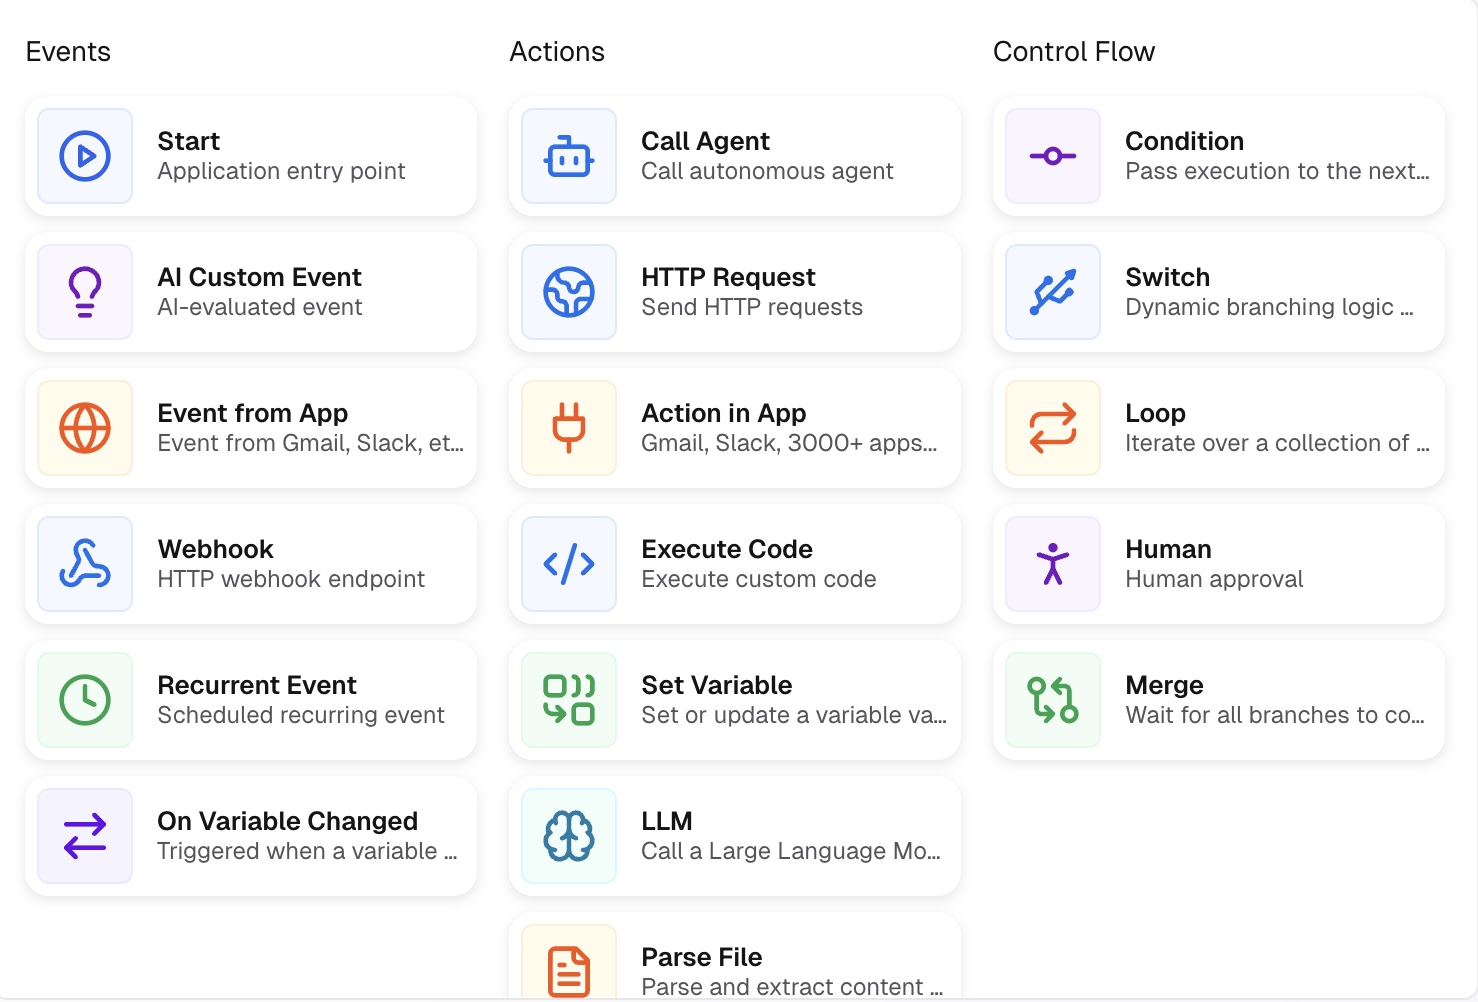
Once you select the node, open it and connect your Google account. The form that users will submit must belong to the same Google account you are connecting.
After connecting your account, enter the Form ID.
The Form ID is the part of the URL that appears after /d/e/ and before /viewform. Copy this value and paste it into the required field.
Alternative option: Convert your Google Form responses into Google Sheets and use the sheet as the starting node. In some cases, this works better due to Google-specific limitations and behavior.
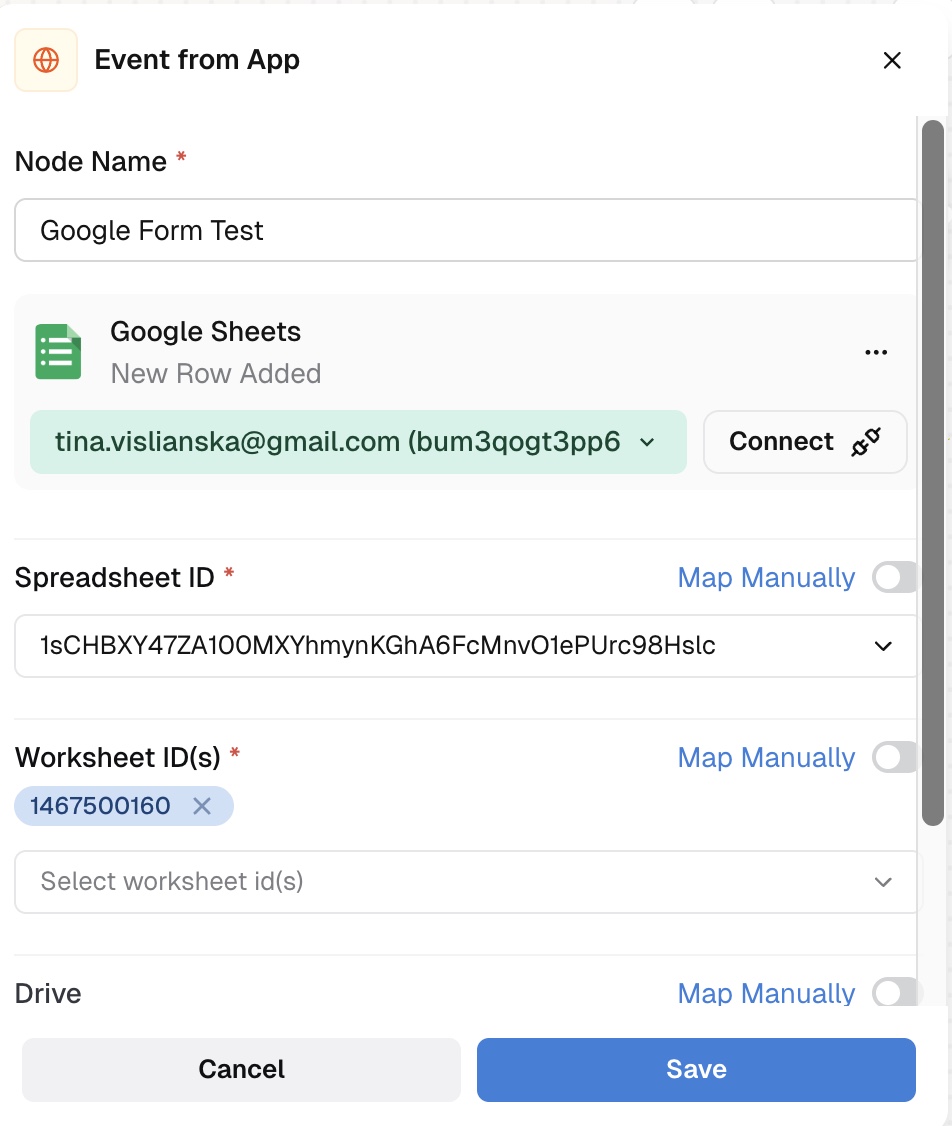
Next, you’ll define what happens after the form is submitted. The first logical action is to validate the submission – checking whether the user provided complete and correct information.
This step prevents your workflow from sending emails to invalid or empty email addresses.
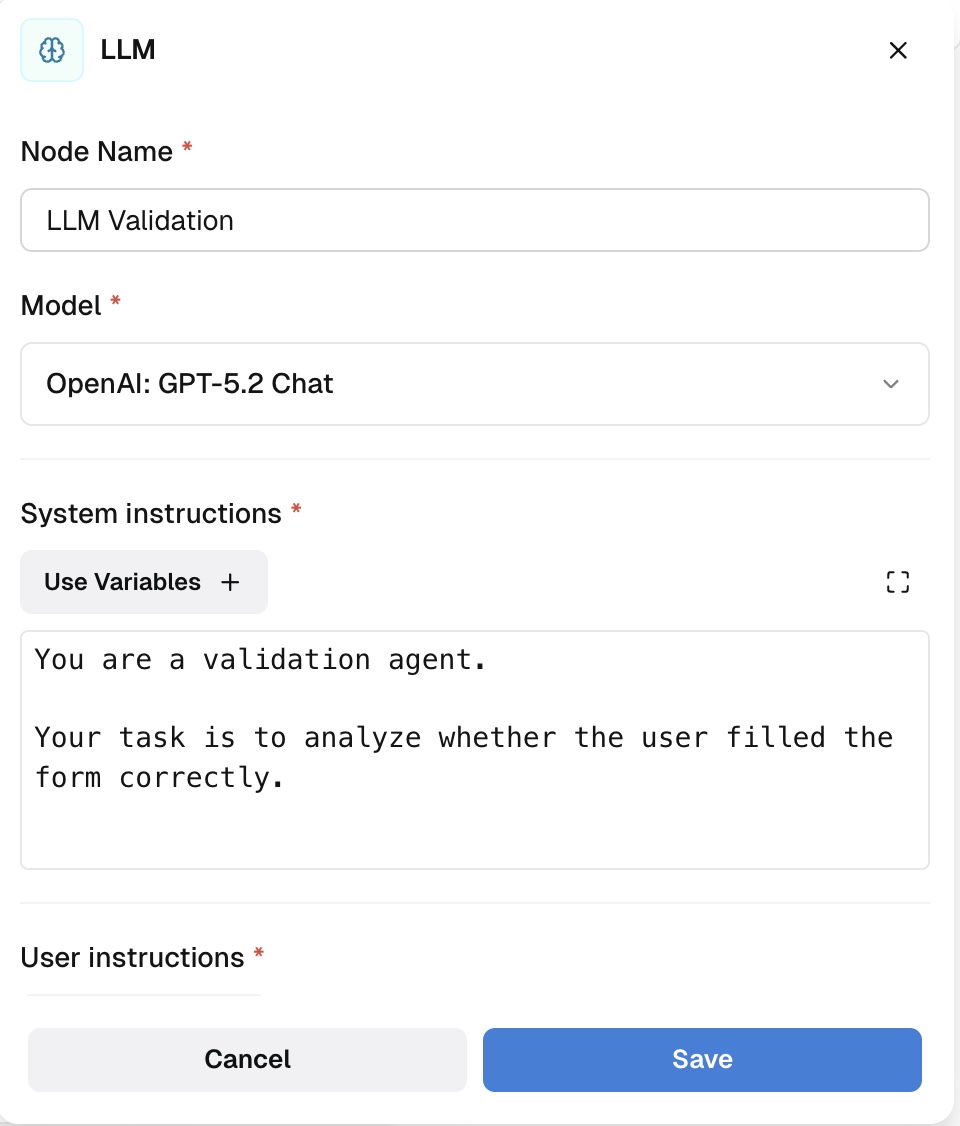
To do this, add an LLM node from the Action set and name it clearly (for example, LLM Validation). Keeping node names clean and descriptive is important for maintaining complex workflows.
Choose a text-based model. For this use case, you can select GPT-5.2 Chat.
This node has two key instruction fields:
Important note: In the User Instructions, you must include the variables that define where the node should pull the required information from. These variables come from the previous node (the Google Sheets Form).
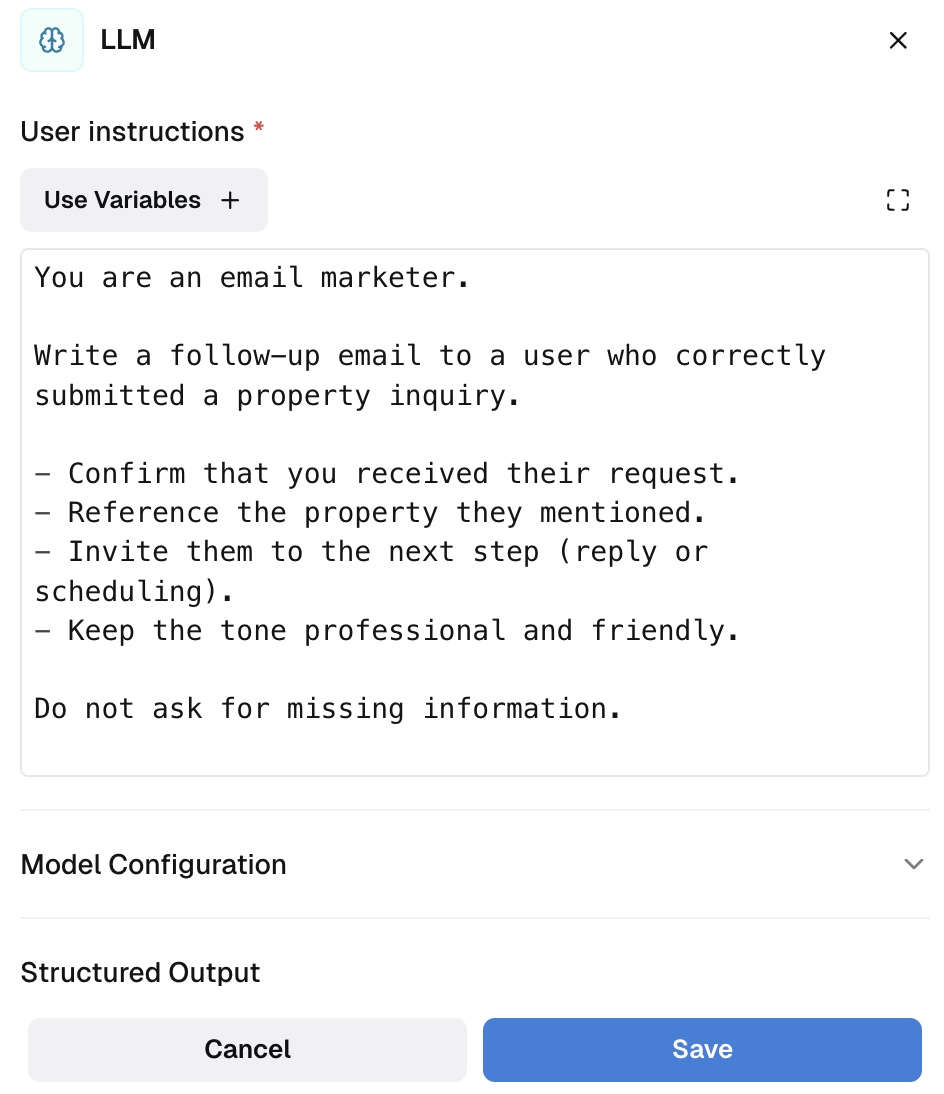
Final step: Configure the structured output. This defines how your data will be mapped. Go to the Structured Output field and add the required parameters. In this scenario, they include the lead name, email, property ID, and a separate field for the validation result.
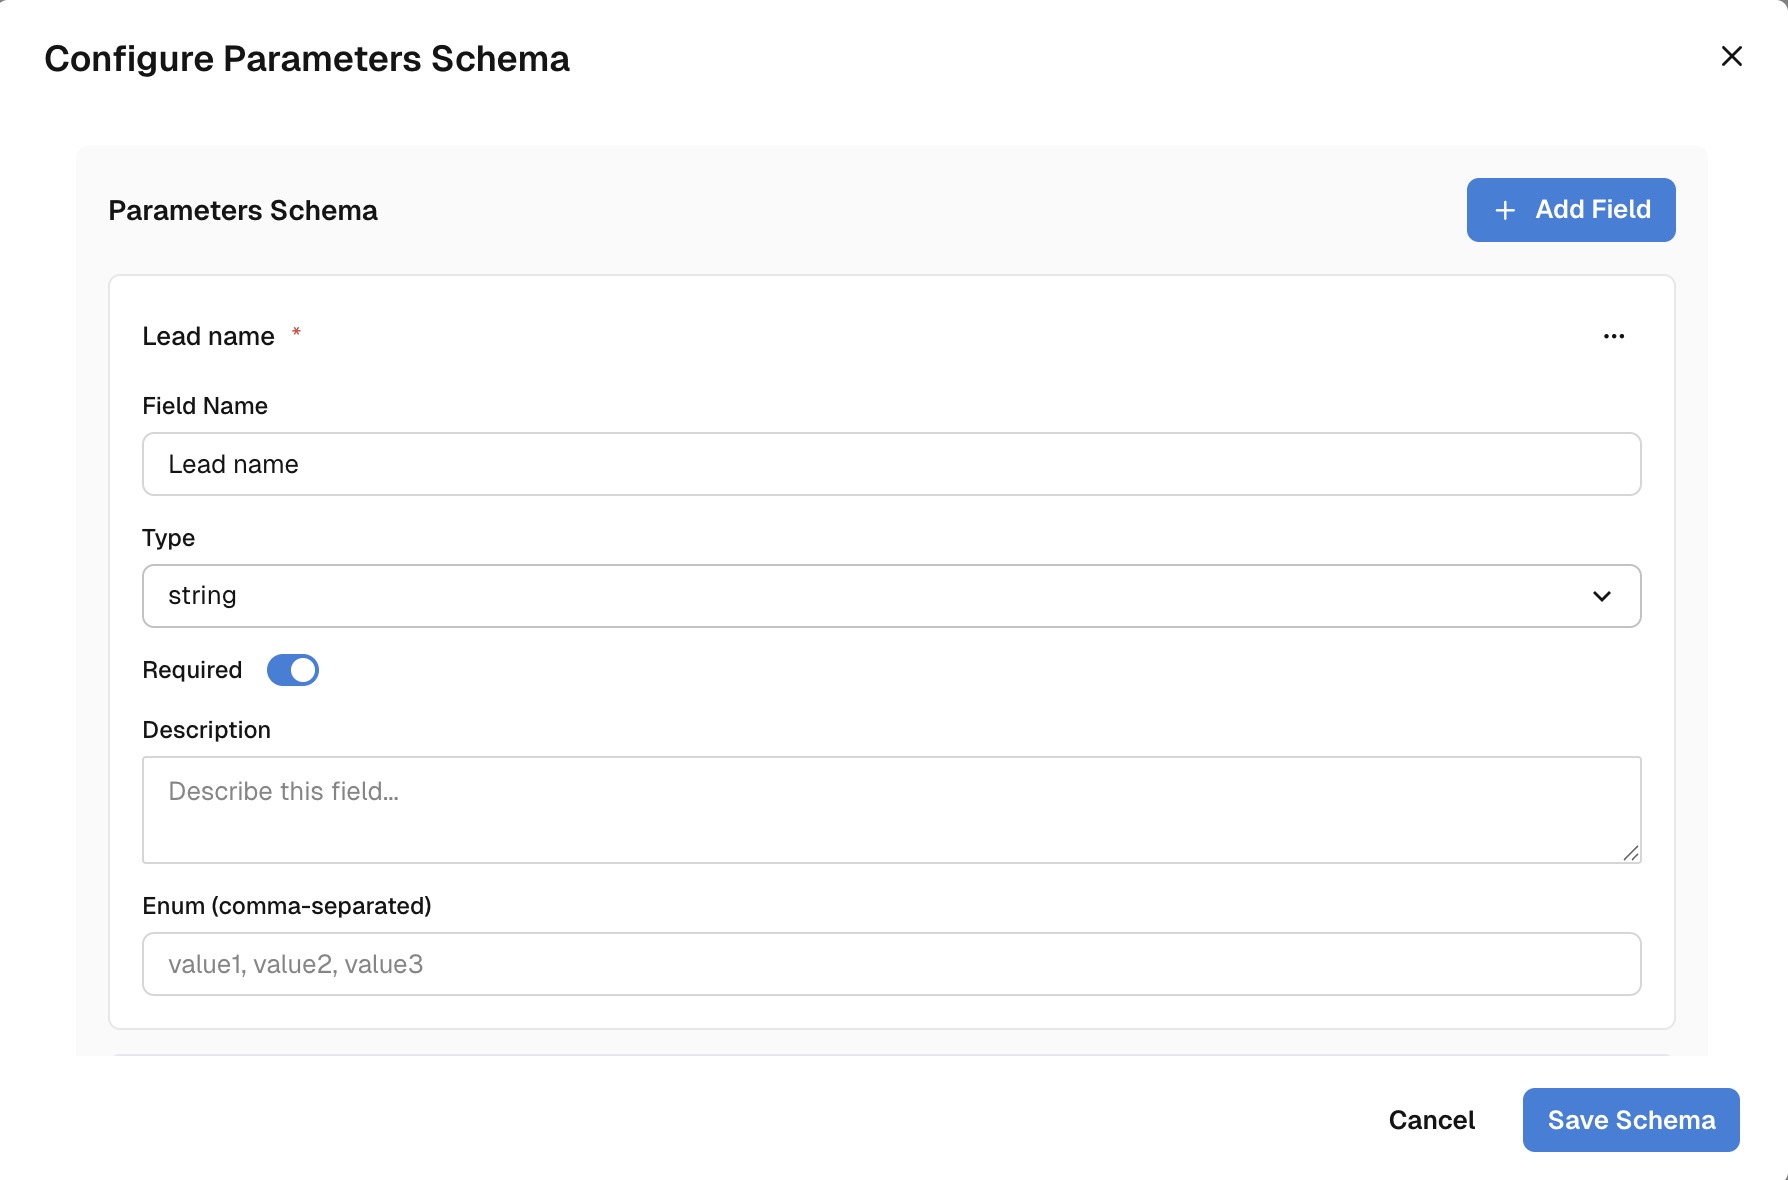
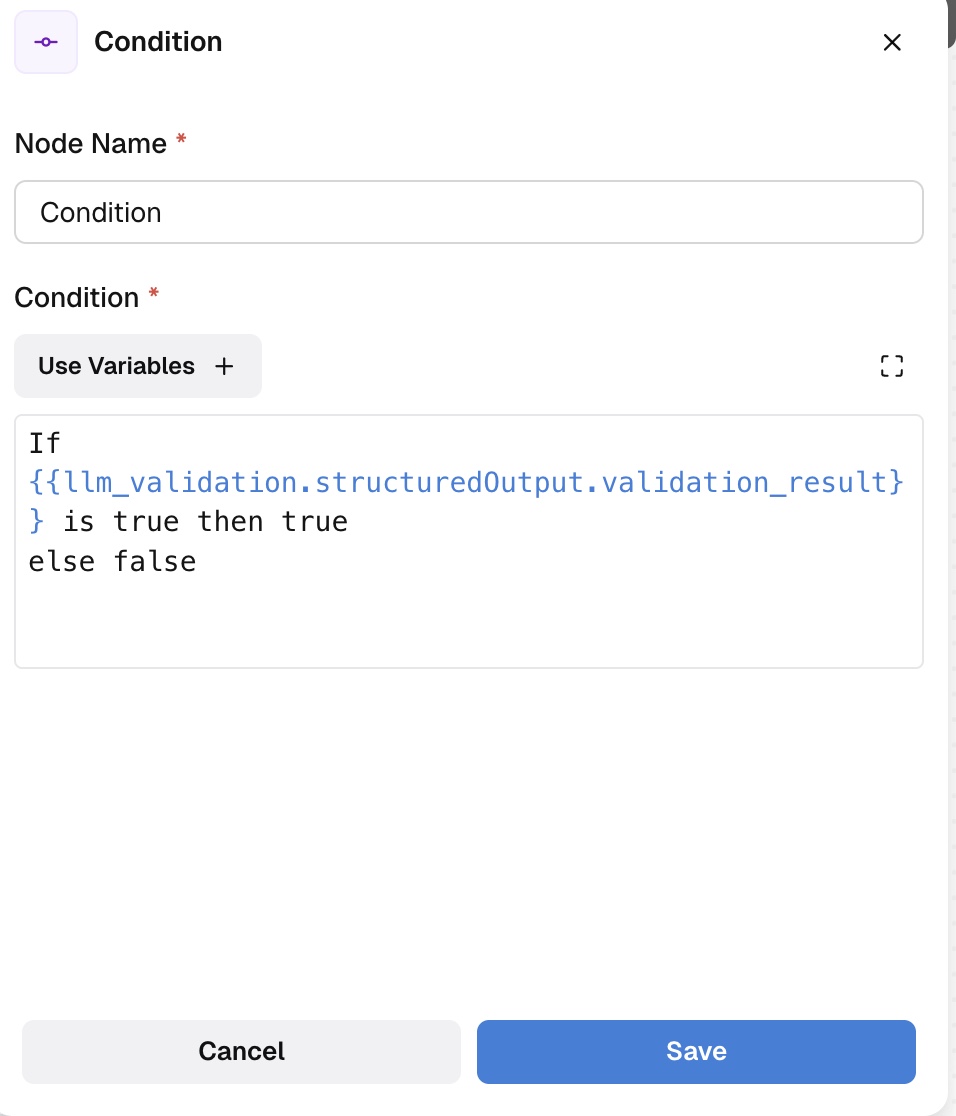
Now, add a Condition node to evaluate the output of the validation LLM.
This node determines whether the form submission meets your validation rules. Based on the result, the workflow will branch into two paths:
As in the previous step, make sure to specify in the Condition node which data it should evaluate.
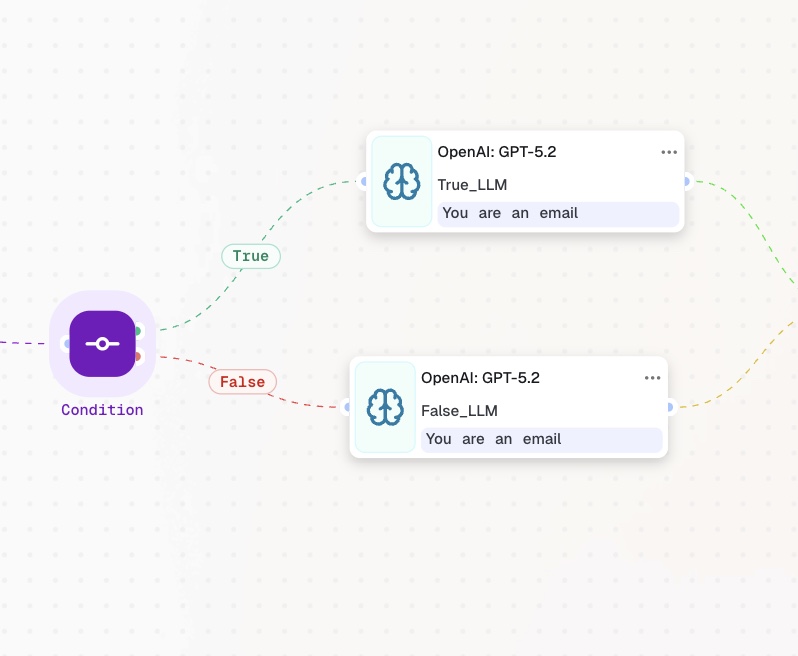
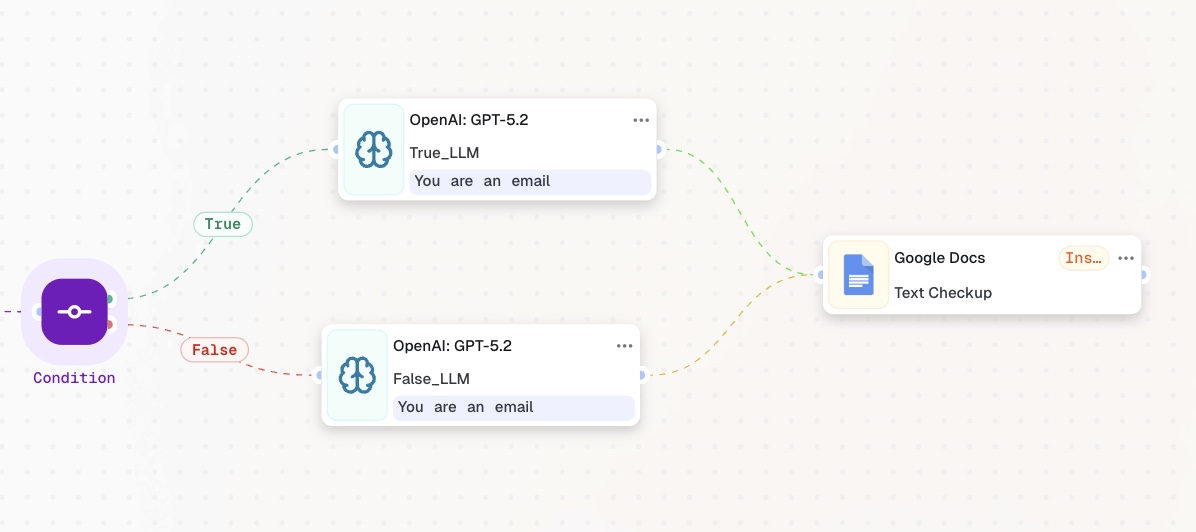
At this stage, you will segment users based on the validation result.
Create two separate LLM nodes:
Each LLM should receive clear user instructions describing:
Connect each LLM node to the corresponding TRUE or FALSE branch of the Condition node.
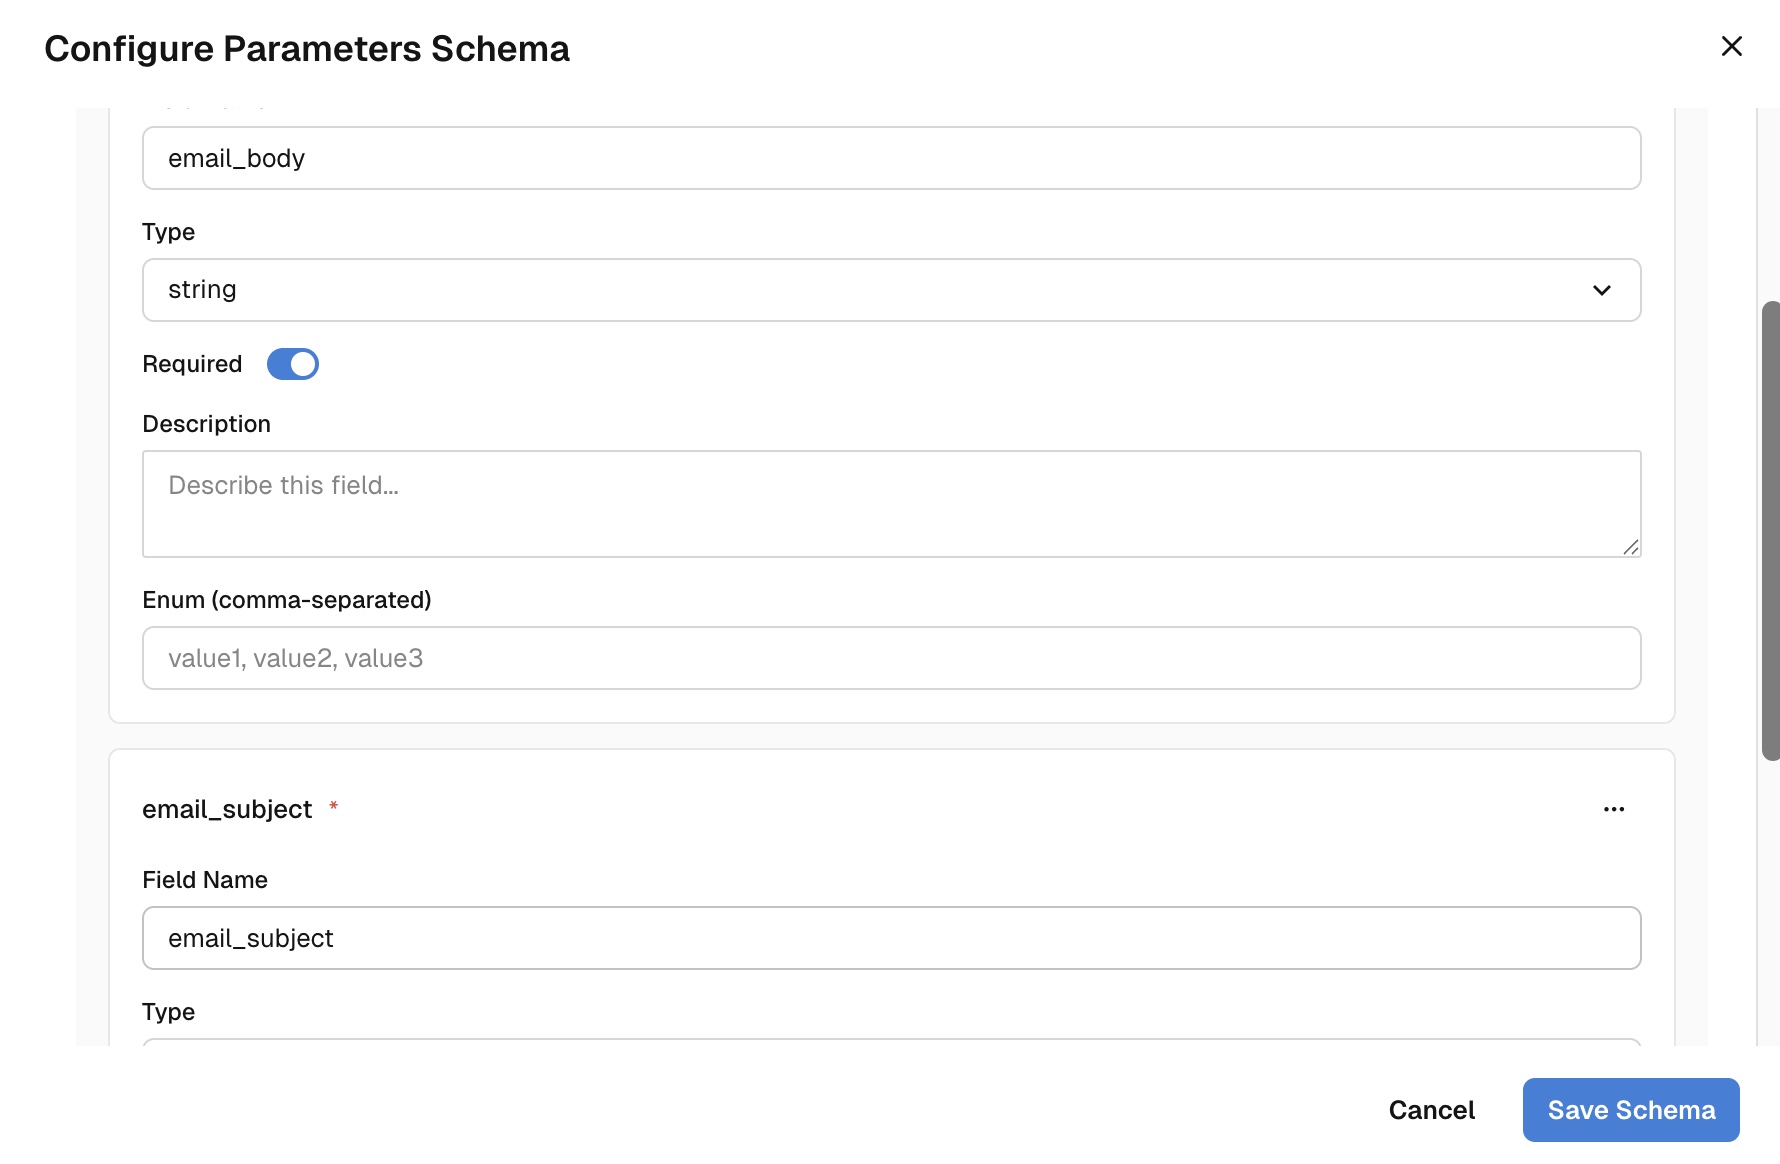
Important: Don’t forget to define how the data should be mapped. In this scenario, you should include email-specific fields such as email, email_subject, email_body, and any other required parameters.
This step is optional but recommended, especially during testing.
You can review the generated email content before sending it by saving the LLM output to a Google Doc. To do this, add an “Action in App” node and connect it to Google Docs.
Once you are satisfied with the output, you can disable or remove this node and proceed to the final step.
Now that the emails are generated, it’s time to send them.
Add two “Action in App” nodes and connect each one to your Google account with the Send Email action selected. Attach each node to the corresponding LLM output.
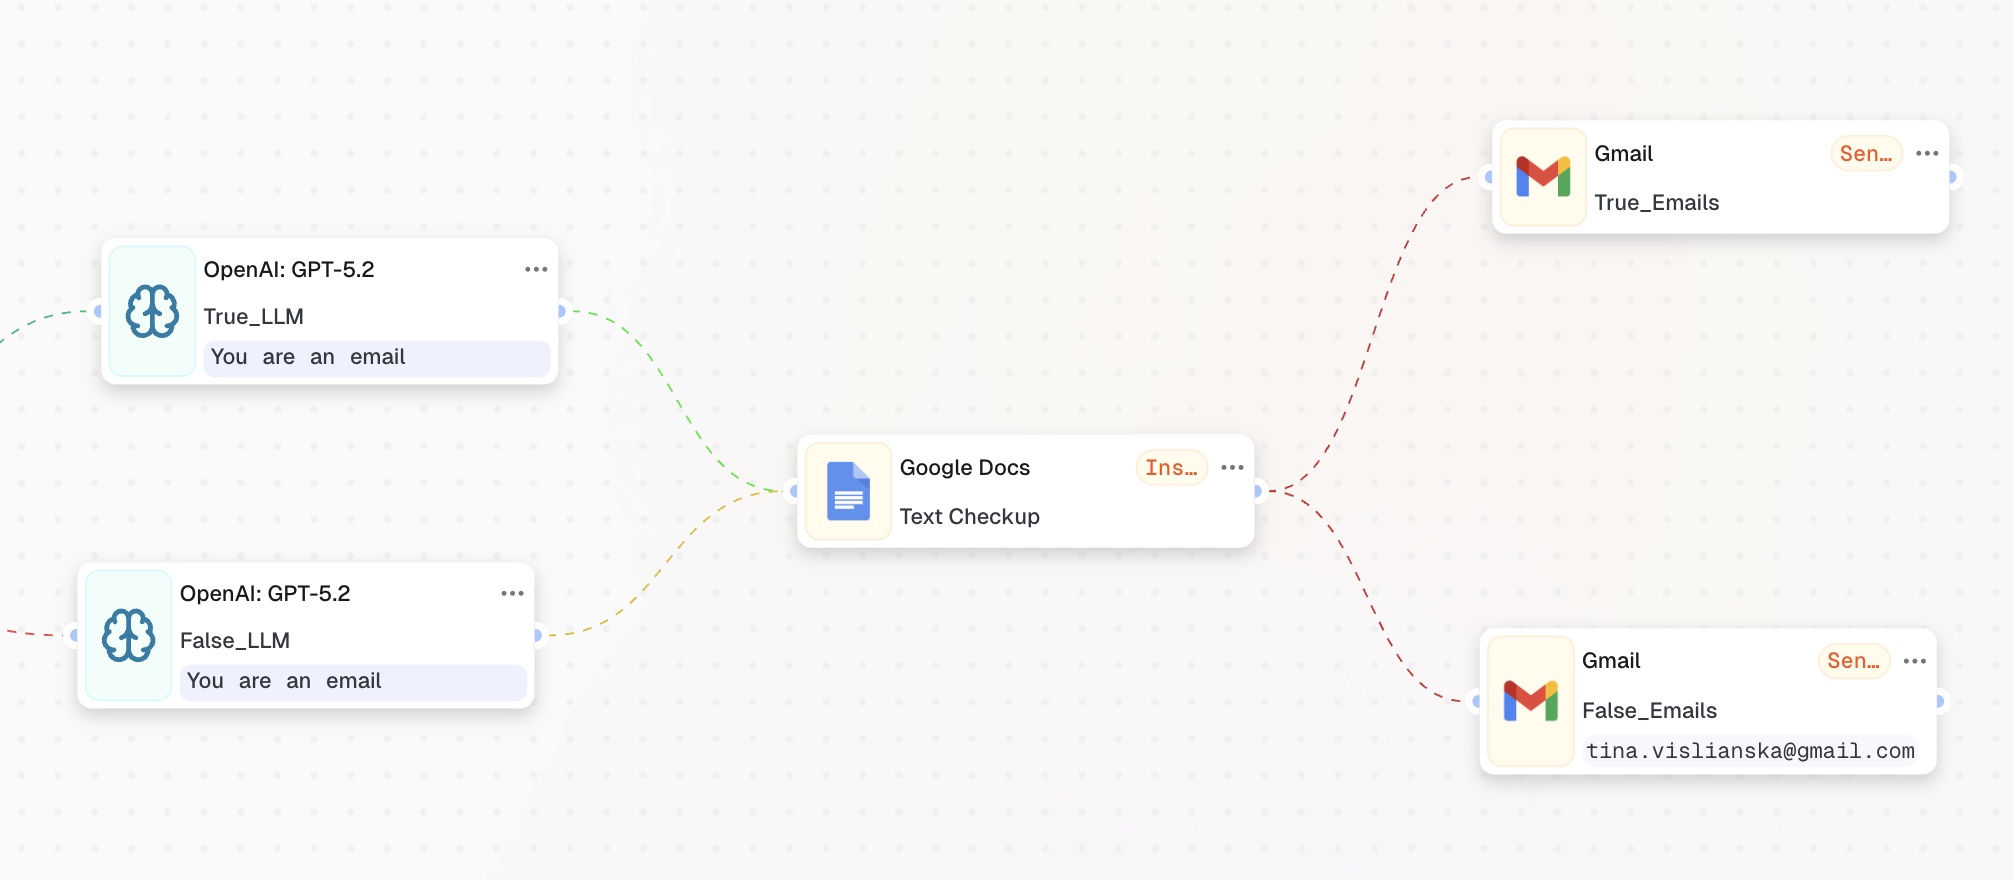
Once connected, the workflow is complete:
Your AI-automated Property Inquiry Auto-Response is now live.
You’ve now built a complete AI-automated Property Inquiry Auto-Response workflow.
Next, take it further by exploring Control Nodes to add advanced routing, retries, approvals, and monitoring to your workflows. You may also want to schedule follow-up emails after 24 or 72 hours.
Be sure to follow us on social media, enable notifications, and don’t miss upcoming guides that show how to grow your business with zero code and minimal effort – all by clicking a single “Start” button.
 Jun 26, 2026
 4 min read
 Jun 26, 2026
4 min read
Jun 26, 2026
4 min read
 Jun 26, 2026
5 min read
Jun 26, 2026
5 min read